Chocolate Goody Filled Christmas Pudding

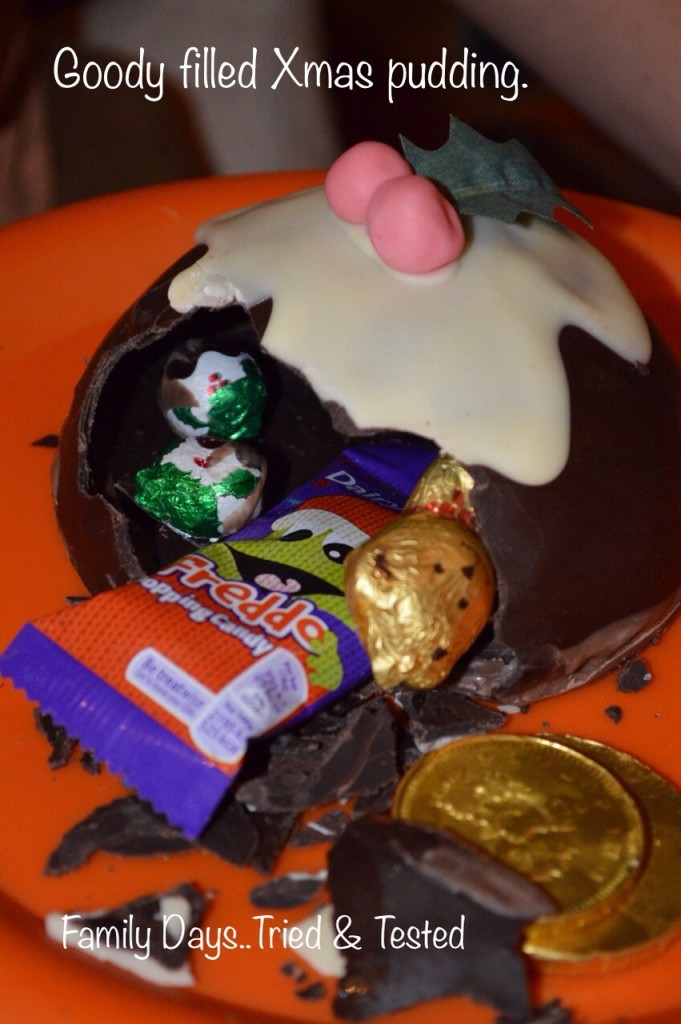
Exactly what it says on the tin! Today we make our chocolate goody-filled Christmas pudding. It’s the perfect homemade surprise treat for Christmas Eve. Here’s how we did it.
See more of our Magical Christmas Traditions and Fun!
At first glance, our pud was pleasing to the eye, scary to the waistline and wondrous to the kids. But beneath the festively delicious exterior, our pud was full of loot.
Ingredients
- milk and white chocolate (cake covering chocolate is better workable)
- balloons
- goodies to go inside
- A couple of red Smarties (optional)

Instructions
Blow up the balloons ensuring you leave a long neck. If the knot is close to the inflated bit you can ensure the balloon is a perfect sphere whilst only inflating to the size you want.

Smear the balloons with butter/margarine/oil to help the chocolate come off easily when the balloons are popped.

Melt your chocolate in a bowl over a saucepan of hot water.

Let the melted chocolate cool a little and SLOWLY dip your balloons into the chocolate to get a good covering. Be warned, if you plunge the balloon into very hot chocolate it will explode!
Put the balloons in mugs and then into the fridge to harden.
Once hardened, repeat the process to give your pudding a good, sturdy thickness.

Place your pudding shells into the fridge to set.

Melt your white chocolate in a bowl over hot water. Then leave it to cool for 5 minutes at room temperature.

Spoon your white chocolate onto the top of the milk chocolate. Be careful not to play with it too much as this will cause the milk chocolate to seep through giving a marbled effect.

Melt some more milk chocolate for your pudding’s base. Leave the chocolate to thicken up in the bowl before pouring a disc shape big enough to fit under your pudding onto a baking sheet. I found that I could guess roughly the size I needed by placing the chocolate-covered balloon into a bowl and then drawing around the bowl onto the baking sheet.

Place your discs and puddings into the fridge to harden.

Once set, carefully peel your balloon from the sides of the chocolate. Important: do not remove the balloon!
Once you have gently peeled away from the sides, you can then pop your balloon and remove it.

Trim the sides of your pudding with scissors or a knife to make it a nice level to put on the base. Using cake covering chocolate makes this easier to do.

Finally, melt a little more chocolate to use as glue to attach the base to the pudding. Don’t forget to fill it with goodies before sealing it!

A couple of spots of melted chocolate are ideal to glue your berries on. I used ready roll icing with a few drops of food colouring but it would be easier to use Smarties.

I added a fake leaf to finish and they are ready to be bashed open on Christmas Eve.

Then all you need to do is crack them open and enjoy!


This looks awesome, I’ll have to try making it 🙂